Easy Equalisation for Beginning your Freediving Journey
This post is in attempt to help freedivers to have a reliable technique to equalise every time they go diving. While this is a work in progress I have attempted to simplify the process and give divers something to work on and practice before they go diving.
Step 1. Master the Frenzel Technique
There are numerous equalisation techniques (at least 8) but the Frenzel technique is the most reliable equalisation technique to get a freediver to “failure depth” (the point at which you cannot equalise any deeper because of the maximum compression of a diver’s lungs) typically between 30 to 40 metres.
Firstly, never force an equalisation. If you feel any discomfort, stop. Do not descend further into a dive.
We recommend you stand in front of a mirror, taking notice of your adam’s apple (at this stage, it is not yet moving). Let your jaw drop gently open. Begin making an audible ‘Kuh. Kuh. Kuh.’ or a ‘Guh. Guh. Guh’ sound (IMPORTANT: make a ‘hard’ ‘uh’ sound not a ‘soft’ ‘uh’ sound or the pressure you create will not be enough for effective equalisation). Notice your adam’s apple moving up and down slightly. It is beginning to act like a piston. Now, like in an engine, you need to get some pressure into the piston chamber (air pressure) for it to ‘fire’ (equalise). In this case, your piston chamber is the air spaces you need to equalise.
Now, while maintaining the strong ‘kuh’ sound, take your thumb and index finger and pinch your nostrils closed. If your ‘kuh’ is strong enough, you will feel and see your nostrils inflating – if you can’t you need to ‘drive’ the sound or ‘push’ the sound more. Do this by making a stronger sound, if you need to. Your mouth is still open.
Next, with closed nostrils and making the sound, slowly close your lips. Feel your cheeks inflate quickly. They will inflate and drive air into your eustachian tubes. Your Adam’s Apple will be ‘driving’ up and down now more noticeably. Squeeze your cheeks slightly, if needed. Feel your equalisation. Your Adam’s Apple has become a piston in a pressure chamber and should be firing.
What else is happening during these steps? Each time you drive the Adam’s Apple up this should be one equalisation. You should feel the back of your tongue pushing up with a strong motion into the soft palate (in contrast to your hard palate which is just behind the top teeth). The tongue is acting like a piston to drive the air up into the Eustachian Tube and into the middle ear.
While it is important to never force an equalisation, If this action is not resulting in an equalisation it is possible that the action is not forceful enough. While looking into the mirror do you notice the area just above where you are pinching the nose inflating or bulging out? If you cannot see this it is likely you are not driving the Adam’s Apple upwards hard enough. You might also observe (or feel with your hands) that your ears might also be moving as the Adam’s Apple moves up. In fact try wriggling your ears at the same time.
You must be able to successfully use the Frenzel technique on land to equalise in both ears before proceeding to the next step.
Step 2 Practice multiple times daily on land
Assuming you want to dive to 20 metres, this could easily be a minimum of 10 equalisations. If you are doing only 6 such dives per hour (which is very conservative) this could be 60 equalisations or nearly 200 equalisations for some 3 hours of diving. No wonder beginners seem to be able to equalise initially but run into trouble over the course of diving. Why? Part of the reason must be due to the fact that there are four small muscles associated with the functioning of the Eustachian Tube and involved in equalising: levator veli palatini; salpingopharyngeus; tensor tympani; and tensor veli palatini (click here for more info). In my opinion like all muscles they fatigue and can be trained to withstand fatigue. How? By performing multiple equalisations daily. For example, while waiting in a line at the checkout at Woolies, while driving, while sitting in a class, lying in bed etc. In fact set a goal and build up to 200 equalisations daily.
Step 3 Avoid dairy products in the week proceeding your diving
The general consensus is that dairy products such as milk and icecream result in more mucous production and have a greater tendency to block the sinuses (the air spaces around your nose). I have a colleague, Professor Jay Browning who lecturers in biology subjects at Griffith University who after reading this article stated “there is no scientific evidence to date that dairy products cause increased mucous production”. You could play it safe and avoid this food group at least in the week proceeding your diving. Up to you, especially if you suspect you have an ‘allergy’ to lactose or dairy products. That’s another issue entirely.
Step 4 Try using a sinus wash
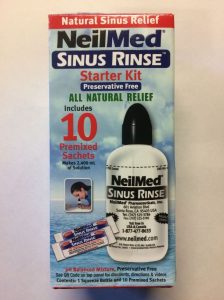
 While a sinus wash has a long history originating with yoga practice and using a neti pot (like a teapot) to irrigate the sinuses, I would recommend the modern equivalent by purchasing the NeilMed Sinus Rinse (click here for more information) or Flo Sinus Care (click here for more information). These products are available from most chemists in Australia. I think daily practice for at least a week proceeding freediving will help to maintain healthy sinuses and ensure easier equalising on the day of diving.
Recent research reported in Australian Doctor (26th July 2016) of a prospective study of 871 patients from 72 GP Clinics in the UK found that:
- Nasal Irrigation produced significant improvements in chronic or recurrent sinus symptoms over a 6 month period.
- Patients who irrigated their sinuses with 150ml saline solution daily showed improvements in sinus symptoms within weeks compared to a control group.
- This group also used fewer over the counter medications such as nasal sprays.
- Steam inhalation made no difference to sinus symptoms.
The Australian Doctor article quoted Professor Richard Harvey who stated that “the benefit of saline was the removal of mucous and inflammatory mediators in the nose and only true irrigation brings this about. Thus simple sprays and inhalations are ineffective. And while higher volume Neti pots were good, the higher volume and positive pressure squeeze bottles were even more effective.”
Step 5. Warm up by equalising prior to diving
Practice the Frenzel technique at least an hour or two prior to freediving to warmup. Again ensure you can equalise on land before venturing into the water. Rotate the head side to side and in semi-circles to relax the muscles around the head. Can you breathe through each nostril? Pinch one side of the nose and breathe though the opposite nostril.
Step 6. Relax. Relax and Relax.
This is the most important step and needs to be worked on the moment you start even thinking about freediving. Very few people actually have a physiological reason and medical diagnosis (perhaps structural) as to why they can’t equalise. They often find that further along in their freediving journey they realise that they are far more relaxed and are able to practice their equalisation while remaining more relaxed than they were when they first began. Remember, relaxation is a ‘verb’ – it’s a ‘doing word’. Therefore, it’s a skill that must be trained and developed. Training takes time. Train yourself to relax your facial and neck muscles. Practice. Practice. Practice.
My favourite Youtube presentation to help in easy equalisation is:
The Diver’s Ear – Under Pressure, Part 1 to 6 by Dr Edmond Kay or read his complete article titled Prevention of Middle Ear Barotrauma.


